Showing posts with label DIY. Show all posts

Monday, March 4, 2013

DIY Dog Pillow

Lately, I've been craving another DIY project.  I decided to make Sunnie a large dog pillow.  I needed a pillow that I could machine wash the case and the pillows inside when Sunnie gets them dirty.  The least expensive dog pillows I've been able to find start at $18.  My goal was to make one cuter and cheaper than that price.  I came out a total of $10.
Victory.
Here's my list of materials:
2 yards of 1 or 2 fabrics
At least 12 inches of velcro
Thread
**Sewing Machine
2 old pillows
One super sweet dog


Mom had these pillows stashed in the attic = money saver!  If you buy pillows, walmart has them for $2.50 each.  I already had white thread.  I sewed the pillows together, with a simple stitch, in the middle so they would not separate.  Prep your fabric by ironing to get all wrinkles and creases out.

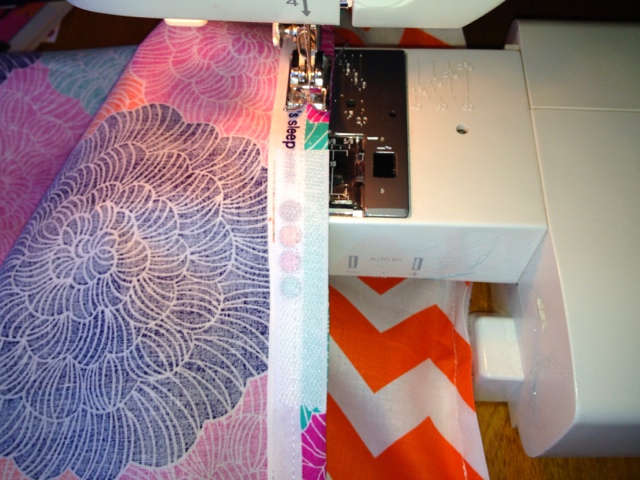
After measuring the pillows' combined length and width, I added two inches to the measurements to make up for the thickness of the pillows and room for my seam.  ((My combined pillow measurements were 35x25))  After cutting, face the colorful sides of the fabric together and pin the edges so you can begin to sew.  After winding your bobbin and thread, sew two long sides and one short side.  Leave the other short side for the velcro step.
TIP:  If you are not confident with your sewing skills, pick a patterned fabric that doesn't show mistake.  My floral pattern doesn't show crookedness at all.  Stripes are something to avoid.

With the fabric still inside out, take your 4, 3 inch strips of velcro.  I ironed the velcro and the edges of the fabric.  Pick two spots of one side of your fabric and pin the velcro.  Match up the other two strips on the opposite side of fabric.  SEW each side.  DO NOT sew the sides together.  The velcro keeps that edge closed. 

Turn your pillow case, poke out the corners, slide your pillows in!  Sunnie was so excited while I was doing this, she was laying on the case and pillows as I was putting them together.

**I loved my fabric combination so much that I brought the chevron around on the floral side.  This wasn't much extra work.  I used scrap fabric of the chevron and sewed it to the floral.  As long as the final length is the same as the other side, you are good.

She's in lurve!

Thursday, September 27, 2012

DIY Old Table Redo

I've been meaning to post this for a while now!  Catch up time :)
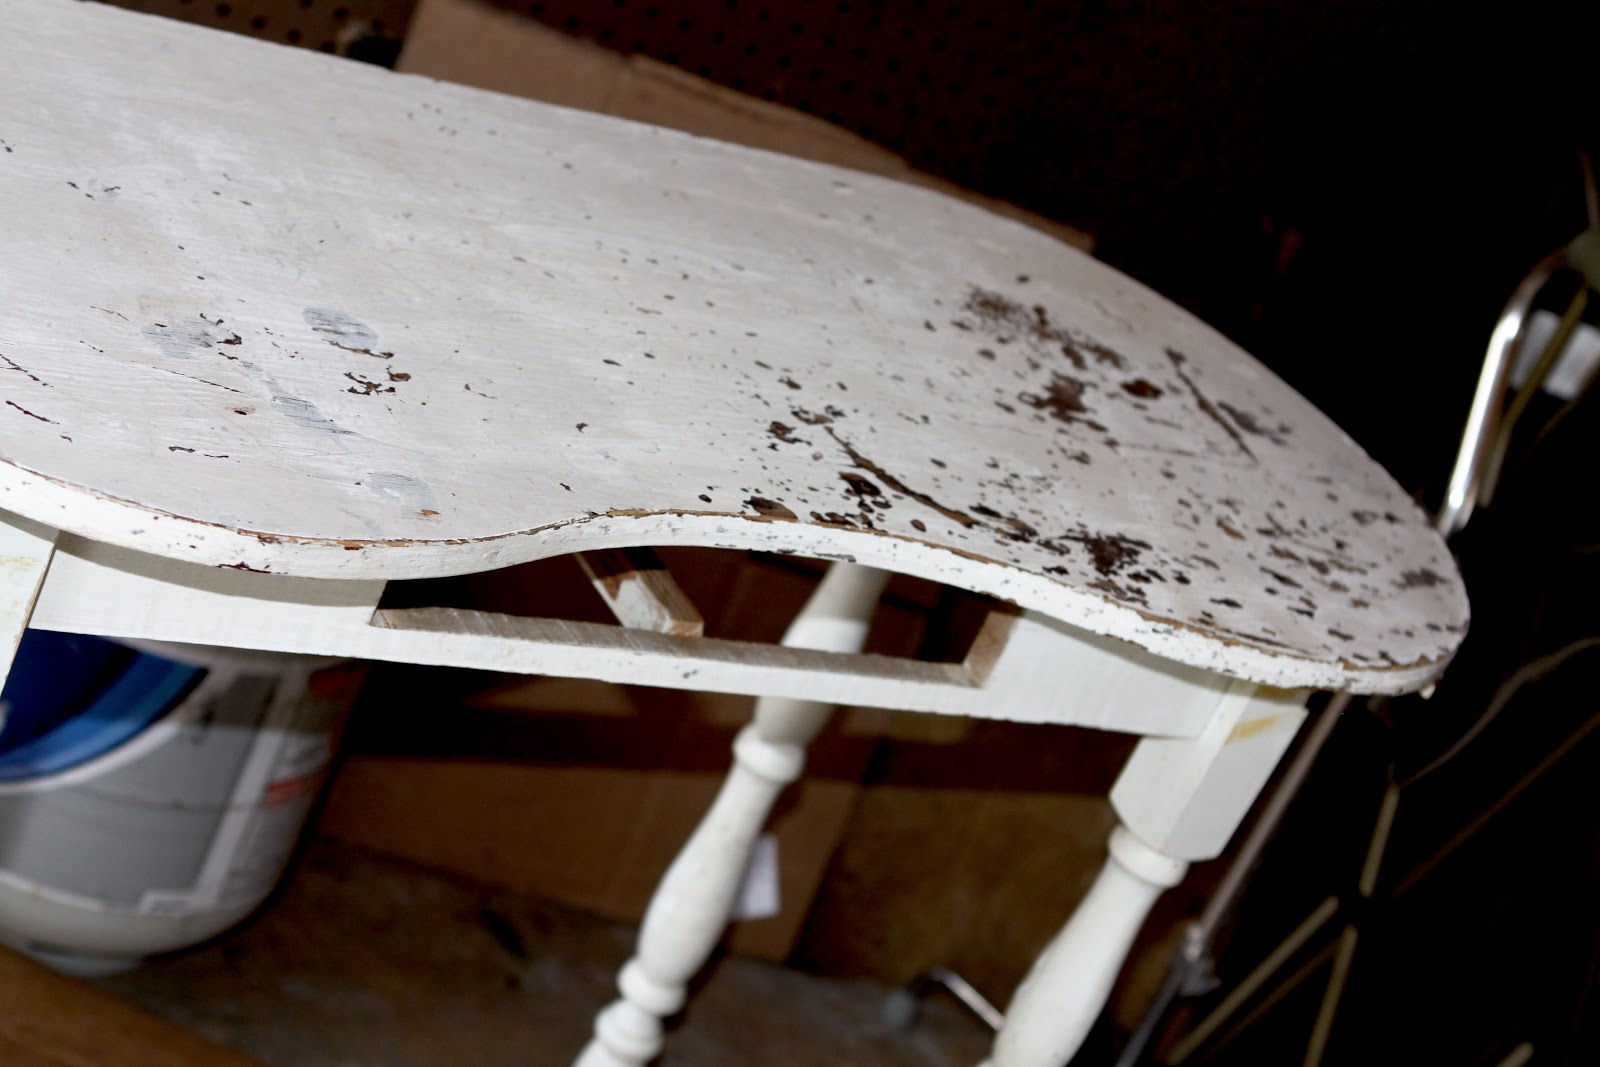
Here's a lovely table that I found while cleaning out a family member's home.  I loved how it was originally, but I knew there'd be a few apartments in our future. . . all probably with white walls.  So I decided to go with a bold, statement color.  I'm so happy with this decision.

To begin, I laid out cardboard to keep my workplace clean.  then washed off the mold. YUCK.  I didn't sand anything because I wanted to preserve natural texture.  This was also a great excuse to get results quicker instead of spending time sanding all these curves.
I added a coat or two of the teal paint.  I got the paint from Lowes.  They have the cute little pint size samples.  It's just enough for a small job like this.
I love my Hobby Lobby Knob.  I bought 4 or 5 and tried them all on, then returned the ones I didn't like.

This is now my desk and will continue being my desk as we move around.  The giant desk we had for me is way too big to be changing houses every time we go somewhere different.

Tuesday, August 14, 2012

Peacock Wedding Theme - DIY

I realize that I never uploaded my wedding pictures to facebook.  It's silly, considering everything else I do is in a facebook album.  What had happened was...there were so many pictures to choose from, I could only narrow down to 300.  AND my lovely photographer(Jana Candler) had uploaded some while Jeff and I were honeymooning. So I didn't bother, I just focused on being a married woman.  Well now that we're a little further down the road(1 year, 3 months) I need to share some details.  There have been quite a few people who have asked about our peacock decorations, so I think a blog is the simplest way to share.  They were all DIY except for the bouquets, which were done by a wholesale flower shop - yaaay budget saver!

1.  First and foremost you must have a groom that you are hopelessly in love with.  That makes the day complete before it even begins.  Then you can start the planning.

2. Must have hot, coordinating shoes.  See above.

3. COLOR is important.  This is what shows up in your pictures!  Must I remind you that pictures/video/husband are the only things you'll have left when the day is over?  I went a little on the different side when it came to my flowers to stick with the teal scheme.  Blue Bomb Orchids, green hydrangeas, purple somethings, and fuchsia somethings.  Originally, I wouldn't have chosen the fuchsia, but the combination needed some help.  Peacock feather were dispersed among the flowers.

4. Must employ big brother to move antique couch from house to peach orchard.

4 1/2.  Bridesmaids dresses from Belk = $40 each.  Groomsmen suits from JC Penney = $99 each.  Groomsmen Ties from Burlington Brands = $6 each.

5. A personal touch- I added a locket(Hobby Lobby-jewelry section) that held my Dad's picture.  It was helpful to have that during the day.


6. Groomsmen Boutonnieres- I trimmed the peacock feather to an appropriate size, to keep from making them distracting instead of complementing.  The pearl and silver beads at the base were held on by a silver pin that you can find in any earring/jewelry making store.  Then used floral tape to hold everything together.  They were a little difficult to make, but I had them done 5 months before the wedding.

7. Personalized Guest Book- This was created on Shutterfly.  I made the cover and peacock pages in a separate program(Adobe Photoshop) and uploaded them as a regular picture, set as the background.  Since the wedding, Jeff and I have enjoyed reading our guests' notes.

8. Programs- This peacock feather was stamped on each program.  Stamp & Ink from Hobby Lobby.  The text was designed on Adobe Illustrator.  I also used a "thank you" stamp and the same feather to make all of our thank you stationary.  It took some time, but I enjoyed them being unique.  Basket from Goodwill.

Now to the reception fun.  These lovely ladies did the hard work!  They dealt with the Asparagus Fern...who knew it was prickly??
9. Centerpieces- Tall narrow glass(borrowed).  This brought height to the room and didn't block table conversation.  The glass was filled with fish tank rocks(mom used these in the garden later).  5 peacock feathers and 4 or 5 peacock swords were placed in each glass, then the asparagus fern to droop down.  Oh and some tan squiggly twigs I got at Goodwill.
 Final Product!


10. Legacy "table"-  I've seen legacy tables done before and I always wonder...who are those people?  I labeled mine and told their relation to Jeff & I.  It was helpful, I think.  These frames and the tree twig/glass vase are now used in my home :)  double dipping.
11. Tree- the twigs were bought from hobby lobby and Hobo's Consignment shop.  I printed out collages of us from Picasso and cut the pictures of Jeff & I, then taped them to coordinating card stock.  Tied with 50% off ribbon from Hobby Lobby.  Peacock feathers were dispersed throughout the arrangement and on the table.


12.  All in all, see number 1, because what actually matters is who signs that marriage license.  It's for better or worse, and I'm not talking about decorations here, I'm talking about LIFE.

Wednesday, March 14, 2012

DIY Directors Chair Redo

One evening I was rushing home after a photo session on Folly Beach and came across these chairs thrown out on the side of the road.  Wonderful thing about Charleston:  the city picks up trash so people dump their stuff on the side of the road.  That makes it free game before the trash trucks come!  Jeff and I were leaving for a weekend in Greenville, but managed to cram 3 directors chairs(unfolded due to rusty hinges) into the back of my car.
Due to little space in our town home I left 2 chairs in Greenville and took one back to Charleston to work on.  Since then, I've finished the chair and the other 2 chairs have disappeared. 
This poor chair was in horrible shape, but I could see potential!  The cloth was stained and grungy so it was tossed.  I scrubbed the grime and grossness off the frame and spray painted it white.  I should have sanded it before painting.


 I was having a hard time visualizing what fabric to select, but when Mom and I saw this we knew it was right.  We were only going to get a yard or so, but the store clerk gave us the rest of the fabric role, "because no one will want the leftover scraps." We came out of the store with 2 yards of fabric so I have an accent pillow for the couch and used the fabric as a background for my DIY Calendar.

Tuesday, February 7, 2012

DIY Weekly Calendar

Variations of these "Our Week" Calendars have been floating around Pinterest lately.  I decided that Jeff and I probably needed something to help keep up with each other.  Really it just helps me keep up with him :)  His class schedule is always changing and my work schedule and photography sessions keep my schedule interesting.  Here's my solution!
This frame was from Goodwill, I got it a really long time ago and had halfway painted it.  The paint color wasn't to my liking so I stop painting and put it away till I wanted to deal with it.  Surprise, I actually liked the color combination once I started putting the pieces together.
Here's what I used:
16x20 frame with glass
18x22 fabric
hot glue gun
paper
scissors
marker
1. Hot glue fabric to the board that came in the frame...that's the easiest way to make sure you have the right size. I did all gluing on the backside with the extra inch of fabric on each side.
2. Cut out papers to and tape to fabric to make your days.
3. Cut circles for the date, tape to fabric/paper.
4. Make sure everything is secure and place in frame, glass first.
Not too shabby!
5. Each week, update your calendar with dry erase markers!

Wednesday, January 25, 2012

DIY Distressed Bed Side Table

In excitement of my upcoming weekend in Greer, where I plan to tackle two DIY projects, I wanted to share some past projects that have found their way into our beachy bungalow here in Charleston.
First, the bed side table.  Mom and I went yard sale browsing and found this for $5.  Only $5?  I jumped on that purchase.  This is a shot of the table after I sanded it and removed the hardware.

Back in Greer we have a wonderful garage that protects any projects from rain and pets.  I miss that, our kitchen doubles as a DIY area and surf board repair area.  Here's the table in the middle of it's painting.  I originally wanted it to be light blue, but not that light.  SO I added some dark green and blue strokes that would show through when I distressed the table.  When you go to Lowes, they have the sample pints of paint, I do everything with those, no need for a gallon.

After working on the bottom layer of paints I did the top coat a blueish-greenish layer.  Don't ask for the paint's name...it's a blend of all the paint I had laying around.  Then I distressed the table with sand paper, a key, and a handheld sander.  A tip for distressing is to do it where the object would actually be bumped against things and where everyday use would wear it down (corners, edges, top, around handles)  The electrical sander was big help for finishing touches.

After all the distressing I did a coat or two of polyurethane.  All the original hardware went back in the table.  A tip for more DIY fun, do more objects while you are doing one.  It's great multitasking and you get more fun things and only have to get your paints and tools out once. Here's some frames I also did in the process...These have all developed their own purpose around our home.

Second, here's one of those frames.  Who said picture frames have to be limited to pictures?  To add to our beachy style, I strung the shells and beads on thin white thread, then hot glued the thread to the frame.  To stop the beads from sliding down, I used a small jewelry clamp at the bottom of each cluster.  Jeff and I found this sand dollar while surfing at Folly Beach.

Thanks for stopping by,
Jenny